Zeal 离线文档阅读
之前也总结过一篇文章,对比了 Zeal 和 Mac 下的 Dash,不过这么长时间过来,已经熟悉了 Zeal,所以再总结一下 Zeal 的使用技巧。
指定文档搜索
Zeal 最常用的方式就是直接搜索方法名或者类名,但是有的时候本地的文档太多,就会出现很多结果,不同语言,不同内容混在一起。所以在 Zeal 搜索框中可以使用前缀来缩小搜索范围。比如想要搜索 java8 中的 ConcurrentMap 那么就可以输入:
java8: ConcurrentMap
自定义 Docset 路径
默认情况下 Zeal 会使用 ~/.local/share/Zeal/Zeal/docsets 作为 Docset 默认路径,这个路径在 ~/.config/Zeal/Zeal.conf 配置文件中。
- 可以手动修改上述配置文件
- 或者在界面中 General 中配置
User generate
用户贡献的 documents.
reference
TypeScript 初识
最近浏览 GitHub 发现一个有趣的项目 PT Plugin Plus 代码拉下来发现是 TypeScript 语言写的,就顺便了解一下。1 目标很简单,不是为了写 ts 项目,只是为了能看懂项目。
ts in 5 minutes
强类型
在 JavaScript 中,变量是没有类型的,只有运行时赋值了才决定变量的类型(这就是所谓的动态语言),但是 TypeScript 在方法定义的时候可以给参数加上类型校验:
function greeter(person: string) {
    return "Hello, " + person;
}
一旦变量类型不匹配,在编译时就会报错。
Interfaces
TypeScript 使用 interface 来定义对象
	interface Person {
		firstName: string;
		lastName: string;
	}
Classes
ts 支持基于类的面向对象编程,classes 和 interfaces 可以协同工作,
class Student {
    fullName: string;
    constructor(public firstName: string, public middleInitial: string, public lastName: string) {
        this.fullName = firstName + " " + middleInitial + " " + lastName;
    }
}

interface Person {
    firstName: string;
    lastName: string;
}

function greeter(person: Person) {
    return "Hello, " + person.firstName + " " + person.lastName;
}

let user = new Student("Jane", "M.", "User");

document.body.textContent = greeter(user);
TypeScript 中 class 和 interfaces 都可以用来定义对象结构和行为,但是有一些区别:
- class 可以实例化,创建对象并使用对象的属性和方法,接口只是对对象的结构定义,不能直接实例化对对象
- class 可以包含属性和方法实现,可以定义构造汉书,访问修饰符;接口智能定义对象结构,不能包含具体实现
- class 支持继承,多态,通过继承来扩展现有类功能;接口不能继承,但是可以通过多个接口组合来达到类似的效果
handbook
类型
TypeScript 支持 JavaScript 的类型,number, string, structure, boolean 等等,不过 TypeScript 增加了枚举类型。
Boolean
let isDone: boolean = false;
Number
let decimal: number = 6;
let hex: number = 0xf00d;
let binary: number = 0b1010;
let octal: number = 0o744;
String
文本是任何一门语言都避免不了的,和 js 一样可以使用双引号和单引号。
let color: string = "blue";
color = 'red';
也可以使用 template strings, 使用反引号 (`) 来框住长文本。
Array
直接声明:
let list: number[] = [1, 2, 3];
或者使用 Array:
let list: Array<number> = [1, 2, 3];
Tuple
元组,用来表达固定长度数组,其他元素不一定类型相同。
定义:
let x: [string, number];
初始化:
x = ["abc", 123];
Enum
枚举类型是 TypeScript 新增加的,用来扩展 number 表达的含义。
enum Color {RED, GREEN, BLUE}
let c: Color = Color.RED;
枚举类型默认从 0 开始,可以手动指定。
enum Color { RED=1, GREEN, BLUE}
enum Color { RED=1, GREEN=2, BLUE=4}
Any
any 类型可以使得开发者可以自行选择使用类型检查,或者不使用。
let notSure: any = 4;
notSure = "maybe a string instead";
notSure = false; // okay, definitely a boolean
Void
void 像是 any 类型的反面,void 经常被用来作为方法的 void 返回。
Null and Undefined
在 ts 中,undefined 和 null 都有各自的类型,和 void 一样,null 和 undefined 一般都不自己使用。默认 null 和 undefined 是其他类型的子类型,这意味着可以将 null 和 undefined 赋值给 number.
Never
never 类型表示类型的值永远不会发生。
Object
非原始类型,不是 number, string, boolean, bigint, symbol, null 或者 undefined.
Type assertions
尖括号语法:
let someValue: any = "this is a string";
let strLength: number = (<string>someValue).length;
as 语法:
let someValue: any = "this is a string";
let strLength: number = (someValue as string).length;
TypeScript 的关键字
let vs var
在 TypeScript 中,var 和 let 是用于声明变量的关键字,它们有一些重要的区别。
- 作用域:使用
var声明的变量具有函数作用域,而使用let声明的变量具有块级作用域。换句话说,var变量在整个函数内都是可见的,而let变量只在声明的块(例如,if 语句块、for 循环块)内可见。 - 变量提升:使用
var声明的变量存在变量提升的特性,即变量可以在声明之前被访问。而let声明的变量没有变量提升,必须在声明之后才能访问。 - 重复声明:使用
var可以重复声明同一个变量,而使用let在同一个作用域内重复声明同一个变量会导致编译错误。 - 全局作用域:在全局作用域中使用
var声明的变量会成为全局对象(window或global)的属性,而使用let声明的变量不会成为全局对象的属性。
推荐在 TypeScript 中使用 let 来声明变量,因为它具有更严格的作用域规则,避免了一些潜在的问题。var 主要用于与旧版 JavaScript 代码的兼容性或特定的使用场景。
const
在 TypeScript 中,const 是用于声明常量的关键字。使用 const 声明的变量必须初始化,并且不能再被重新赋值。
使用 const 声明的常量具有以下特点:
- 值不能被修改:一旦使用
const声明了一个变量并赋予初始值,就不能再对其进行重新赋值。尝试重新赋值会导致编译错误。 - 块级作用域:与
let类似,const也具有块级作用域。它在声明的块(例如,if 语句块、for 循环块)内有效。 - 对象属性和数组元素:使用
const声明的常量可以是对象的属性或数组的元素。虽然不能对整个对象或数组进行重新赋值,但可以修改对象的属性或数组的元素。
const person = {
 name: "John",
 age: 25
};
person.age = 26; // 可以修改对象的属性
const numbers = [1, 2, 3];
numbers.push(4); // 可以修改数组的元素
使用 const 可以提高代码的可读性和可维护性,并且在编译时会进行常量折叠,有助于优化代码执行效率。建议在需要声明不可变的常量时使用 const。
reference
清理 macOS 磁盘
在使用一段时间的 macOS 之后,在打开磁盘就会发现其中有一大部分的磁盘被 Other 占用。这一部分内容在磁盘管理里面是看不到详情的,也就没有办法手动进行管理。
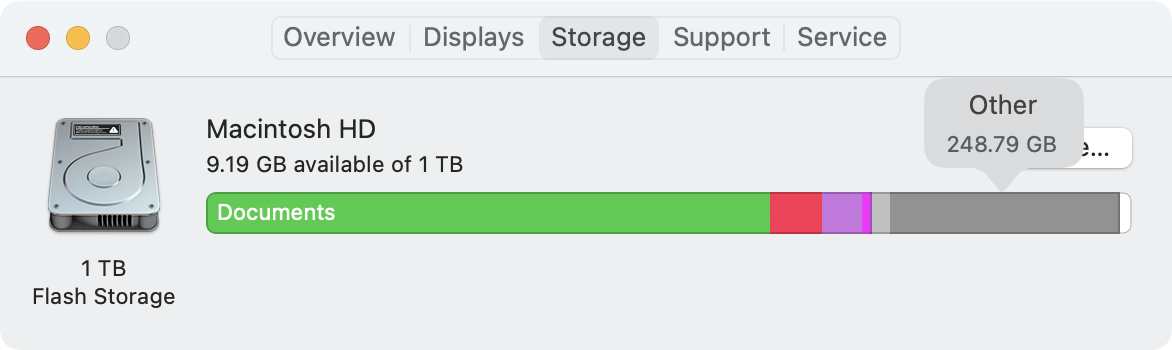
磁盘中的 Other 是什么?
macOS 可以识别很多类型的文件,比如说音频,视频,应用等等,但是还有很多其他类型的文件系统是无法识别的,那么就会把这些文件统计成 Other。比如说系统临时文件,应用的缓存文件,日志文件等等。
如何清理磁盘中的 Other?
清理磁盘中的 Other 可以帮助释放磁盘空间,提高系统性能。以下是一些方法可以尝试:
- 使用第三方工具:有很多专门用于清理 macOS 系统文件的第三方工具,比如 CleanMyMac, 柠檬清理等。这些工具可以扫描并清理系统中的临时文件、缓存文件等,帮助释放磁盘空间。
- 手动清理:可以通过 Finder 手动查找并删除一些不需要的文件,比如下载文件夹、桌面上的临时文件等。也可以尝试清理浏览器缓存、邮件附件等。
- 清理日志文件:日志文件可能会占用大量空间,在终端中输入命令
sudo rm -rf /private/var/log/*可以删除系统日志。 - 清理应用缓存:有些应用会生成大量缓存文件,可以尝试在应用设置中找到清理缓存的选项,或者卸载并重新安装应用来清除缓存。
- 升级 macOS 版本:有时候升级到最新版本的 macOS 可能会自动进行一些系统优化和清理操作,帮助释放磁盘空间。
NAS 下文件系统比较
记录一下常见的 Linux 的文件系统。
ext4
ext4 是目前 Debian/Ubuntu/Mint 的默认文件系统,比较常见,它其实是第 4 代扩展文件系统 (Fourth extended filesystem), 是 ext3 的延续。
- ext4 对大文件有着比较好的支持,最大支持 1 EiB 的卷,标准 4Kib 块大小下支持单文件最大 16 TiB
- Extents
- ext4 兼容 ext3, ext2
- ext4 允许对一些文件预留空间 (Persistent pre-allocation)
- Delayed allocation
- 无限制的子目录,Linux 4.12 及以后
largedir功能使用 3 级 HTree,允许在单目录下拥有大约 6 百万条目 - ext4 使用日志校验和来提高稳定性
- ext4 使用纳秒来管理 timestamp
- Linux kernel 4.1 后加入了透明加密
- ext4 支持默认写屏障,确保了即使写时断电,文件的元信息可以正确写入磁盘
更多的 ext4 的特性,可以参考 wiki
ZFS
ZFS 是由 Sun Microsystems 设计的组合文件系统和逻辑卷管理器。ZFS 具有良好的扩展性,可以有效防止数据损坏,对高容量有着良好支持,可以有效压缩数据,有快照功能,有 copy-on-write 特性,支持完整性检查,支持 RAID-Z。ZFS 最初是 Sun 作为 Solaris 内部开发的闭源软件,2005 年跟随着 Solaris 开源。2010 年,Sun 被 Oracle 收购,ZFS 成为 Oracle 的注册商标,Oracle 停止为新的 OpenSolaris 和 ZFS 开发发布更新的源代码,从而有效地将 Oracle 的 ZFS 恢复为封闭源代码。作为回应开源社区建立了 illumos 项目,维护 Solaris 开发,并在 2013 年成立 OpenZFS 继续开源版本的 ZFS 开发。OpenZFS 被广泛用于类 Unix 系统中。1
- ZFS 为数据长期存储和扩容而设计
- ZFS 支持存储池,可以建立跨越磁盘的存储池
- copy-on-write, ZFS 文件系统中,新信息会被写入到不同的 block 中,写完成后元数据将更新指向为新信息,这个机制可以保证写过程中即使系统崩溃,旧数据也会保留,这意味着系统崩溃后无需执行 fsck.
- 数据和元数据分开存储,用以校验整个文件系统,在文件发生损坏时及时修复
- 在某些情况下,如果发生错误或不一致,将自动回滚文件系统和数据的最新更改。
- ZFS 有自己的 RAID,RAID-Z 实现
- ZFS 文件系统能够提供最大 16 EiB 文件大小,最大 256 万亿 ZiB 存储
btrfs
btrfs 是 b-tree 文件系统的缩写,最初是 Oracle 为 Linux 而设计,遵循着 copy-on-write 原则。btrfs 旨在解决 Linux 文件系统中缺乏 pooling,快照,校验和和完整的多设备跨接的问题。2
XFS 文件系统
XFS 是一个高性能 64 bit 日志文件系统, 1993 年由 Silicon Graphics, Inc (SGI) 公司创建,原来是作为该公司 IRIX 操作系统 5.3 版本后的默认文件系统,后在 2001 年被移植到 Linux Kernel,XFS 被大多数的 Linux 发行版支持,XFS 适合用来处理大文件。3
JFS 文件系统
JFS是一款由IBM开发的64位日志文件系统。支持AIX,eComStation,OS/2和Linux等操作系统。
f2fs
F2FS 是一种闪存文件系统,由金载极在三星集团研发,适合Linux内核使用。此文件系统起初是为了NAND闪存的存储设备设计,这些设备广泛存在于自移动设备至服务器领域。 三星应用了日志结构文件系统的概念,使它更适合用于存储设备。4
使用 flexget 实现下载更新自动化
FlexGet 官网是这样描述自己的,媒体文件的多功能自动化工具。可以支持 torrents, nzbs, podcasts, comics, TV, movies, RSS, HTML, CSV, 等等作为输入。FlexGet 是 Python 编写的,所以如果想要实现更加复杂的功能,也可以自己写脚本来处理。
简单的来说,FlexGet 解决 BT 客户端没有订阅功能的问题,通过 FlexGet 可以方便的制定一些规则来自动订阅并自动下载特定的种子,比如在追剧集时,按照特定的名字以及文件大小,或者分辨率自动进行下载。
FlexGet 一大被称道的就是可以实现 PT 或者 BT 的自动下载,并且直接传给 Deluge, transmission, uTorrent, rTorrent, SABnzb 等等客户端进行下载。FlexGet 也集成了 trakt, thetvdb.com, imdb.com 等等网站可以用来追踪剧集。
FlexGet 可以自定义任务,自定义运行时间,有一个友好的 Web 界面,然后还有很多很多有待发现的功能。
在没有了解到 FlexGet 之前,我都是手动将 torrent 文件下载到 ~/Downloads 目录中,然后在 crontab 中将下载目录中的所有 torrent 文件 rsync 到 Transmission 或者 ruTorrent 的 watch 文件夹中的。
*/1 * * * * rsync -avz -e "ssh -p xxxx" --remove-source-files /home/einverne/Downloads/*.torrent xxx@ip:/share/Transmission/watch/
但是自从有了 Flexget 我发现借助 Flexget 可以实现很多自动化工作,以前手工执行的工作完全可以解放出来。比如将 PT 中收藏的内容添加到下载的 RSS 中,然后通过 Flexget 自动下载到硬盘中,比如自动下载 PT 中最近更新的 Free 种子。
docker install
使用 Docker 进行安装,我这里用的是 wiserain/flexget 镜像:1
这里的 PUID,PGID 可以在终端使用 id 命令来查看,替换成当前用户的 ID 即可。
docker run -d \
    --name=flexget \
    -e PUID=1000 \
    -e PGID=1000 \
    -e FG_WEBUI_PASSWD=yourhorriblesecret \
    -e FG_LOG_LEVEL=info \
    -e TZ=Asia/Shanghai \
    -p 5050:5050 \
    -v ~/flexget/config:/config \
    -v ~/flexget/data:/data \
    wiserain/flexget
说明:
~/flexget/config: 目录中是 flexget 的配置文件~/flexget/data: 目录保存 Flexget 下载的文件
或者使用 Docker Compose 安装。
docker-compose:
version: '3.3'

services:
  flexget:
    image: wiserain/flexget
    restart: always
    container_name: flexget
    environment:
      - PUID=1000
      - PGID=1000
      - FG_WEBUI_PASSWD=${PASSWD}
      - FG_LOG_LEVEL=info
      - TZ=Asia/Shanghai
    ports:
      - '5050:5050'
    volumes:
      - '~/flexget/config:/config'
      - '~/flexget/data:/data'
等容器启动之后,访问 5050 端口,用户名 flexget 密码为在配置中设定的密码,访问后台。
Plugins
flexget 更多的插件可以在这里 查到。
配置详解
进入后台,或者直接编辑配置文件夹中的 config.yml 文件都可以直接对 flexget 进行配置,更推荐在命令行中进行修改。
一份简单的配置
首先来看一个最简单的配置,方便快速入门,这个配置仅有一个 task,并且只定义了一个定时器。
web_server:
  bind: 0.0.0.0
  port: 5050
  web_ui: yes

tasks:
  btschool:
    rss: http://example.com/rss
    # 种子的下载目录
    download: /data
    # 把 RSS 链接里的所有种子都下载下来,不做过滤
    accept_all: yes

schedules:
  - tasks: '*'
    interval:
      minutes: 60
上面的配置一目了然,也不过多解释,大致就是定义了一个RSS 下载任务,会下载这个 RSS 中所有的内容,并保存到 /data/ 目录。
下面就单独演示一下稍微复杂一些的用例,比如过滤标题,文件大小,等等。
针对个别任务设置定时
在上面的配置中使用通配符 * 来匹配了所有的任务,如果要指定任务设定定时,可以
schedules:
  - tasks: 'task_name'
    interval:
      minutes: 15
稍微复杂一些的配置
通过正则表达式过滤标题
tasks 定义:
# tasks 定义多个任务,在下方定义
tasks:
  # 自定义 task 名字,名字可以自己起
  task_name:
    rss: http://example.com/torrentrss.php
	# 可选项 yes/no,是否下载全部内容,还是按条件过滤
    accept_all: no
    regexp:
      accept:
        - some-title
      reject:
        - 1080
      from: title
    content_size:
      min: 1000
      max: 10000
      strict: no
	# 种子下载的路径
    download: /data
    deluge:
      password: "deluge"
      path: /data
  another-task:
    rss: https://example.com/torrentrss.php
    accept_all: no
    if:
      - "'1996' in title": accept
      - "'720' in title": accept
    content_size:
      min: 1000
      max: 10000
      strict: no
    download: /data
    deluge:
	  host: locahost
	  port: 13222
	  user: someone
      password: "deluge"
      path: /data
还可以通过配置预设模板的方法:
templates:
# 剩余空间监控,当配置的 path 路径的剩余空间小于 space 规定的数值时,停止 RSS 下载
  freespace:
    free_space:
      path: /home/einverne
      space: 10240
# qb 的模板,之后写 qb 就是指把种子推送到 qb 进行下载;下面 tr de rt 也是如此
  qb:
    qbittorrent:
      path: /home/einverne/qbittorrent/download/
      host: localhost
      port: 2017
      username: einverne
      password: password
  tr:
    transmission:
      path: /home/einverne/transmission/download/
      host: localhost
      port: 9091
      username: einverne
      password: password
  de:
    deluge:
      path: /home/einverne/deluge/download/
      host: localhost
      port: 58846
      username: einverne
      password: password
# 体积过滤模板,min 是符合条件的最小种子体积,max 是符合条件的最大种子体积,单位均为 MB
# strict 默认是 yes,表示在无法确定大小的情况下就不下载,这里把它改成 no
# size 的意思是,只下载体积为 1000-666666 MB 的种子,其他不满足条件的种子不下载
  size:
    content_size:
      min: 1000
      max: 666666
      strict: no

# 任务
tasks:
# Web-HDSky 是任务名称,基本上随便起
  Web-HDSky:
    rss: https://hdsky.me/torrentrss.php
    # 因为 HDSWEB 发单集的时候用的标题是一样的, 因此下过一次后
    # 之后新发出来的单集由于标题一样,flexget 会当成是以前已经下过的种子
    # 为了避免这个问题,对 seen 插件设定为只检查 url 是否一致
    seen:
      fields:
        - url
  # 正则表达式;标题带 HDSWEB 的种子就下载(accept,接受),不想下载的话就写拒绝(reject)
    regexp:
      accept:
        - HDSWEB
  # 调用上边的 de 模板
    template: de
  # 可以不使用模板的体积过滤,针对每个任务单独设置体积过滤
    content_size:
      min: 3000
      max: 500000
      strict: no
  # 以下设定实现的效果:对这个任务加载到 deluge 的种子,自动添加 WEB-DL 的标签
  # 自动限制上传速度到 10MB/s(防止超速),下完后自动移动到 /mnt/HDSky/HDSWEB
    deluge:
      label: WEB-DL
      # Limit upload speed to 100 MiB/s in case of being auto-banned
      max_up_speed: 10240
      move_completed_path: /mnt/HDSky/HDSWEB
  ADC-AnimeBD-JPN:
    rss: http://asiandvdclub.org/rss.xml
    if:
      - "'Anime' and 'AVC' in title": accept
      - "'subs only' in title": reject
      - "'Custom' in description": reject
      # 这三个过滤条件组合起来就是,下载标题里带 Anime 和 AVC 且不含 subs only 的种子
      # 并排除掉描述里含有 Custom 的种子
      # 这也就约等于,RSS 日版动画蓝光碟(非日版、DIY 碟、DVD 都过滤掉)
    # RSS ADC 需要 Cookies,这里我们用 headers 插件来加上 cookies
    headers:
      Cookie: "uid=12345; pass=abcdefg"
    # 转换 RSS 链接,将原本形如 http://asiandvdclub.org/details.php?id=123456 的种子描述页面链接
    # 替换为形如 http://asiandvdclub.org/download.php?id=123456 的种子下载链接
    urlrewrite:
      sitename:
        regexp: 'http://asiandvdclub.org/details.php\?id=(?P<id>\d+)'
        format: 'http://asiandvdclub.org/download.php?id=\g<id>'
    qbittorrent:
      label: ADC
      # Flexget 支持添加种子到 qBittorrent 的时候自动设定单种限速
      maxdownspeed: 30000
Web UI 设置
# Flexget WebUI 设定 (WebUI如何开启见后文)
web_server:
  port: 6566
  web_ui: yes
# base_url: /flexget
# base_url 是为了反代设置的,需要使用反代的话就取消这个的注释,然后在安装了 rTorrent 的情况下(不装 rt 的话没有 nginx)
# Flexget WebUI 地址就变成了 https://IP/flexget
Transmission 配置
如果要配置 Transmission 可以通过 Transmission 插件配置
tasks:
  one-task:
    rss: https://example.com/torrentrss.php
    accept_all: no
    # 通过正则表达式匹配标题中有 some-title 的内容,accept 表示接受,而 reject 表示带有 1080 的就不接受
    regexp:
      accept:
        - some-title
      reject:
        - 1080
      from: title
    content_size:
      min: 3000
      max: 180000
      strict: no
    download: /data
    transmission:
      host: localhost
      port: 9091
      username: user
      password: "pass"
更多该插件的参数和使用可以参考官网
template
如果需要配置更加复杂的,可以使用 template
templates:
  # freespace 插件
  freespace:
    free_space:
      path: /data
      space: 10240
  qb:
    qbittorrent:
      path: /data
      host: localhost
      port: 8080
      username: admin
      password: password
  de:
    deluge:
      password: "deluge"
      path: /data
  tr:
    transmission:
      host: localhost
      port: 9091
      username: admin
      password: "password"
tasks:
  BTSchool:
    rss: https://pt.btschool.net/torrentrss.php
    accept_all: yes
    template:
      - de
  HDChina:
    rss: https://hdchina.org/torrentrss.php
    accept_all: yes
    template:
      - qb
    qbittorrent:
      label: HDChina
  CHDBits:
    rss: https://chdbits.co/torrentrss.php
    accept_all: no
    if:
      - "'CHDPAD' in title": reject
      - "'CHDPad' in title": reject
      - "'CHD' in title": accept
    template:
      - tr
  U2:
    rss: https://u2.dmhy.org/torrentrss.php
    accept_all: no
    regexp:
      accept_excluding:
        - DVD
        - ADC
        - TTG
        - TSDM
      from: title
    download: /data/torrent/
  Mteam:
    rss: https://tp.m-team.cc/torrentrss.php
    accept_all: no
    regexp:
      accept:
        - sweety
      from: title
    download: /data/torrent/
  GZtown:
    rss: https://pt.gztown.net/torrentrss.php
    accept_all: no
    if:
      - "'GZtown' in title": accept
    download: /data/torrent/
  HDSky:
    rss: https://hdsky.me/torrentrss.php
    accept_all: yes
    download: /data/torrent/
  Ourbits:
    rss: https://ourbits.club/torrentrss.php
    accept_all: yes
    download: /data/torrent/
  ezrss:
    rss: http://eztv.ag/ezrss.xml
    accept_all: yes
    content_size:
      min: 200
      max: 4444
      strict: no
    download: /data
定义 Schedules
常见的定时器,比如定时每 10 分钟跑一次,或者在特定时间执行一次。
设置固定间隔时间执行:
# 针对所有的任务,每隔 10 分钟执行一次
schedules:
  - tasks: '*'
    interval:
      minutes: 10
或者你可以设置更加复杂的定时规则,针对具体的任务名设定:[^schedule]
[^schedule]
schedules:
  - tasks: 'Update-Queue'
    interval:
      hours: 3
  - tasks: 'Series-*'
    interval:
      minutes: 30
  - tasks: 'Movies-*'
    interval:
      hours: 1
  - tasks: 'Update-trakt-*'
    interval:
      days: 1
      at_time: 4:43 am
  - tasks: [HDC, btschool]
    interval:
      minutes: 30
如果不配置 Schedule 也可以通过 cron 命令来定时执行,比如每隔 30 分钟执行一次:
*/30 * * * * /usr/local/bin/flexget --cron execute
常用命令
使用 Docker 安装的话,可以手动进入容器执行 sudo docker exec -it flexget /bin/bash,然后执行:
flexget check: 用于检查config.yml配置文件是否有格式错误。flexget --test execute: 手动模拟一次 RSS 操作,仅供测试,不会下载种子文件到本地。flexget execute: 手动执行所有任务flexget execute --tasks Series-*: 手动执行指定的任务flexget status: 查看 flexget 的 RSS 记录。flexget execute --learn: 这样子不会下载种子,但是会把这次 RSS 到的种子标记为已下载,这样之后就不会下到老种了
疑难杂症
下载后文件名乱码问题
查看终端编码是否配置了支持 UTF-8.
最后,个人搭建了一个私人的 PT,分享一些电影、图书、综艺,欢迎来玩。
reference
我有一台服务器能做什么:自架的服务整理
很多年前当我拥有第一台 VPS 的时候,我也曾经问我我自己,这一台 VPS 服务器能做什么,当时最简单的想法就是能够假设一个 WordPress,发布一些自己感兴趣的内容,然而时间过去了快 10 年,中间互联网尤其是开源社区的发展让 Self-hosted 成为了我过去 5 年的主要关键字。
而我也逐渐将大厂的服务迁移出来,搬到了我自己的假设的服务器中。虽然确实可能会多出来一些维护成本,但我发现当数据和代码掌握在自己手里的时候才是真正安全的。虽然可能需要考虑到备份,运维等等一系列复杂的问题,但还是比大厂的服务动辄关闭服务要安心许多。
所以这篇文章主要整理比较流行的可以自建的服务,按照功能分类,基本上每个功能下都有一个服务在跑着。
很多搭建教程都已经在之前的文章中有提到,所以这篇文章不会具体展开搭建过程,主要用来记录一下,并在各个服务之间做一个简单的比较,以及我选择的理由。
本文不可能囊括很多内容,GitHub 上有一个 awesome-selfhosted 仓库,里面详细记录着许许多多开源的优秀自建项目,本文为涉及到的内容可以自行参考该项目。另外这个项目也是一个学习的好地方,每一个开源项目都标注着实现语言,如果想要系统的学习某一个实现这里也是不错的选择。
文中有很多自建成本比较高的服务,比如要去自建 SMTP 邮件服务,那么可能需要一个比较稳定的服务器,一个比较干净的 IP 地址,还需要手工配置很多的 DNS 记录,最关键的是不能让服务器停机,否则就会影响到关键邮件的收发。虽然自建邮件服务器也有比较成熟的方案,比如 MailCow,Mailu 等等,但因为涉及内容比较复杂本文不详细展开。后续如果有机会的话再写文章总结。
DNS
自建家用的 DNS 服务,有两个不错的开源选择:
- Pi-hole,A black hole for Internet advertisements
- AdGuard Home,AdGuard Home 是 AdGuard 推出的开源的 DNS 去广告系统
Pi-hole 相较于普通用户使用稍微复杂一些,但是功能更强大。AdGuard Home 则在界面设计和使用使用层面更加便于使用。
代码
博客类
具体来说,是 CMS,内容管理平台
- [[WordPress]],老牌的 CMS 管理平台,PHP 编写。
- [[Typecho]],Typecho PHP 建站的又一个选择,比较轻量小巧,但是功能一样强大。
- [[Ghost]] 是一个基于 Node.js 开发的开源博客平台,旨在提供一种简单、纯粹的写作和发布体验。它具有干净、现代的界面设计和优秀的性能,是一个非常受欢迎的博客平台。
- [[Halo]] 是一个 Java 编写的开源博客平台。
如果作为个人的内容发布,其实还可以选择静态内容生成器,比如我使用的 [[Jekyll]],或者可以搜索 Static Site Generator,你可以找到这种语言编写的上百种服务。
- [[Jekyll]],Ruby 编写的静态页面生成器,也可以作为博客系统使用。
- [[Hugo]] 是一个 Go 语言编写的静态网站生成器,特点就是快。
- [[Hexo]] 是一个使用 Node.js 实现的静态网站生成器
- Lektor,Python 编写的静态网站生成器。
RSS 相关
- RSSHub 将不带 RSS 输出的内容生成 RSS
- RSS-Bridge,一款 PHP 编写的转成 RSS 输出的工具
- Full Text RSS
RSS 阅读器
自从 Google Reader 关闭后,就一直用的 InoReader,完全没有任何问题,不过因为买了 NAS,就索性把 RSS 也自建了一个。数据在自己的数据库里面还是很安心的。我选用的是时间最久,功能比较稳定的 Tiny Tiny RSS. 当然也还有 FreshRSS,miniflux,NewsBlur 等可以选择。
Tiny Tiny RSS 和 FreshRSS 都是 PHP 编写的,[[miniflux]] 比较新是 Go 写的,NewsBlur 则是 Python.
更多自建的方案可以参考这篇文章。
- [[FreshRSS]]
- [[rssant]]
代码托管
代码托管除了非常著名的 [[GitLab]],其实还有很多选择,比如 Go 编写的 Gogs,以及它的 fork, Gitea。个人在 NAS 上用的 Gogs,不过要我现在再选,我可能会用 Gitea。
- [[GitLab]] 更加重的选择
- [[Gitea]]
- [[Gogs]]
GitLab 是一个比较完善的解决方案,但缺点就是重,维护成本高。Gogs 和 Gitea 都是比较轻量的选择。
CI
- [[Jenkins]]
- Gitea Action
- drone
容器管理
密码管理器
[[Bitwarden]] 是一个我使用多年的密码管理器,在线同步,并且所有系统的客户端都是齐全的。
每日签到
使用 qiandao 来搭建自己的自动化每日签到网站。
统计数据
[[2023-05-13-google-analytics-alternative]]
- [[Umami]]
- Plausible
- [[Matomo]]
Umami
Umami 是一个使用 Node.js 编写可以自建的网站统计系统,作为 CNZZ/Google Analytics 代替品。[[Umami]] 相对于 [[Matomo]] 较好的一点是没有那么消耗资源,非常轻量,100 M 左右内存就能运行。
Matomo
- Matomo 是一个类似 Google Analytics 的工具
邮件服务器
自建 [[邮件服务器]] 是一个比较复杂并且需要长期维护的工作,不仅需要有一个赶紧的 IP,而且需要特别注意多个和邮件相关的协议配置。
- [[mailcow]],使用 Mailcow 自建邮件服务器
- [[Mailu]],使用 Mailu 搭建邮件服务器
- [[Poste]]
- maddy 是一个用 Go 语言实现的邮件服务器
在线粘贴板
- [[hastebin]] 是一个 Node.js 实现的开源版本 pastebin。
- PrivateBin 是一个开源的,使用 PHP 实现的 pastebin.
Web archiving
提交链接自动存档页面内容。
文件管理
文件管理及同步,我使用 [[NextCloud]],没使用 NextCloud 之前,我使用 Dropbox 作为同步工具。
和 NextCloud(ownCloud) 类似的也还有 [[FileRun]], seaFile 等
和 NextCloud 中心化不同的另一个文件同步 Syncthing 也要强烈推荐,自己架设都比较简单。
多年的使用之后,我选择了 Syncthing 作为唯一的文件同步工具。
下载类
下面这些工具都因为可以下载种子而被人所知,不过也可以用来分享文件的。
BT/PT 类:
- [[Transmission]]
- [[qTorrent]]
- [[ruTorrent]]
上面这几个都能找到对应的 Docker image.
ruTorrent
YouTube 视频下载
youtube-dl
这个项目在 youtube-dl 上实现了一个 Web 界面,可以方面的通过请求提交任务:
文件分享
File Browser
File Browser 是一个使用 Go 语言和 Vue 实现的在线文档共享。只依赖于 SQLite 数据库存储最基本的数据。
FileRun
FileRun 是一个基于浏览器的文件分享和同步工具。兼容 NextCloud 客户端。
alist
[[alist]] 是一个支持多种存储的文件列表程序,也可以作为聚合网盘,使用 [[Gin]] 和 React 构建。
媒体管理
- [[Plex]]
- [[Jellyfin]]
- [[Emby]]
[[Plex Emby Jellyfin 的区别]]
其他
- [[Sonarr]]
- [[Radarr]]
- [[Prowlarr]]
- [[MeTube]]
Self host IFTTT
n8n.io 是一个可以自建的 IFTTT 类似的工具,可以实现发生什么之后触发动作,并且支持编程,非常强大。
[[Huginn]] 也是一个不错的 IFTTT 开源代替品。
稍后阅读
开源版本的稍后阅读,wallabag 。
可以用来代替 Pocket 和 Instapaper。
网站收藏
Anki 同步服务器
电子书管理
Calibre-web
Calibre-web
LazyLibrarian
LazyLibrarian is a program to follow authors and grab metadata for all your digital reading needs.
talebook
这是一个 Calibre 和 Vue 结合的在线图书站点
图片管理类
主要是对图片的管理,比较著名的是 PHP 编写的 Chevereto。
其他图床
- sapic 一款使用 Flask 编写的图床。可存储到又拍云、七牛云、阿里云 OSS、腾讯云 COS、GitHub、Gitee、S3 等,支持自定义扩展。
- lsky-pro PHP
- auxpi Go
- EasyImage
- Piwigo
- Ownphoto
- PhotoPrism
- Lychee
Lychee
官网地址:
PhotoView
备份
Duplicati
通过 FTP, SSH, WebDAV 协议备份,或者将文件备份到云端 Backblaze B2, Microsoft OneDrive, Amazon S3, Google Drive, box.com, Mega, hubiC 等。
Syncthing
Syncthing 是我对比了一系列的同步工具之后选择的,基本上已经满足了我日常所有的需求。
Translate tool
翻译相关的自建服务,提供了上传文本,协同翻译的能力。
Weblate
Docker composte 安装
VoIP
- teamspeak 3
阅后即焚
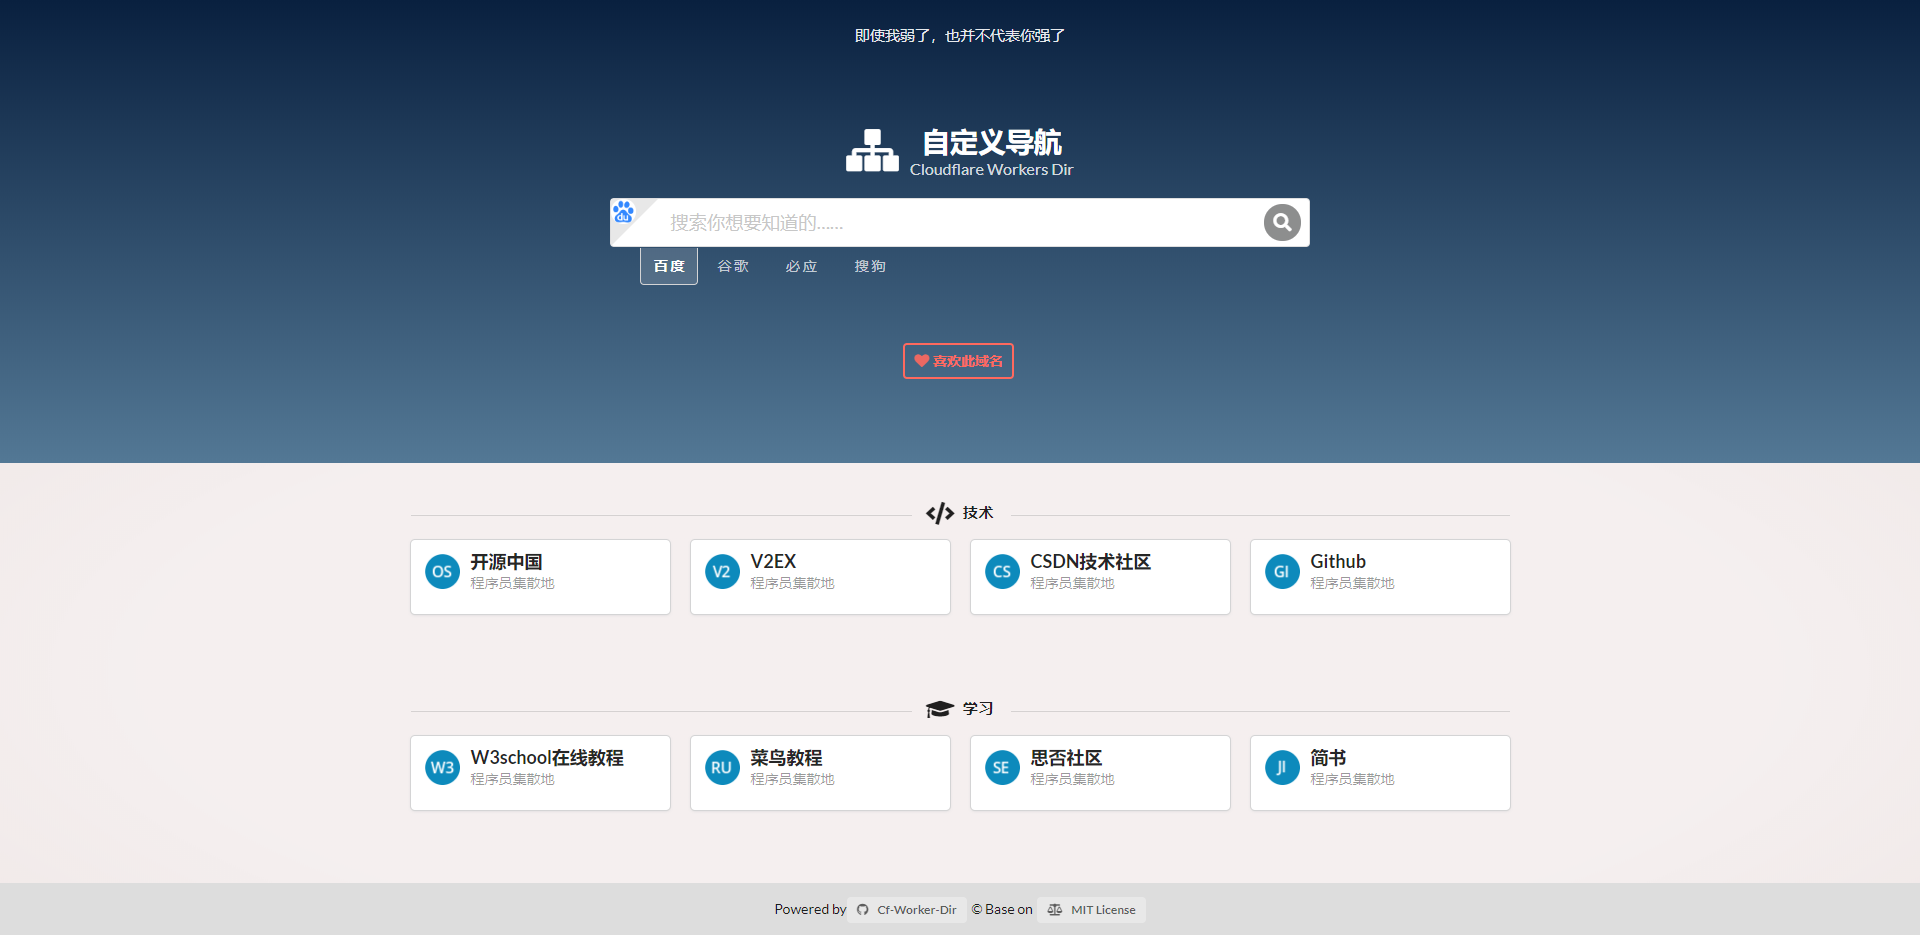
搜索导航类
anyi 导航、聚合搜索、webstack
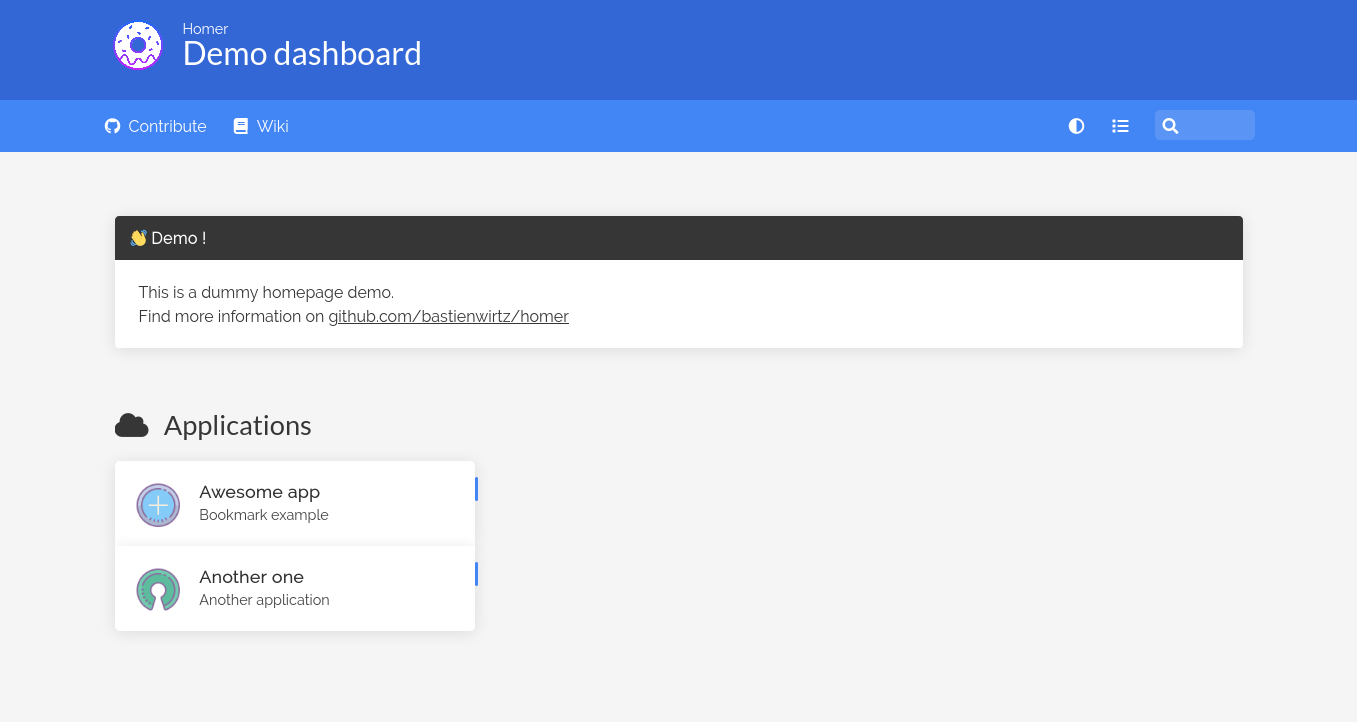
Homer
[[Homer]] 是一个非常简单的静态页面导航网站,可以通过 yaml 配置生成一个漂亮的个人导航页。
homepage
homepage 也是一个非常不错的面板。
CF-Worker-Dir
这是一个基于 Cloudflare Worker 的导航页面。
heimdall
一个非常漂亮的导航站
geek-navigation
onenav
服务器监控
雅黑探针、云探针、netdata
nezha 监控(哪吒监控)
哪吒监控是使用 Go 语言和 Vue 实现的一个监控面板,可以轻松地监控 CPU,内存,网速等等。详情可见文章。
论坛
Discourse
[[Discourse]] 是由 Stack Overflow 创始人之一的 Jeff Atwood 主导的开源论坛项目。摒弃了传统的话题讨论形式,可以无限加载内容,非常适合桌面端和客户端。Discourse 提供了非常丰富的配置方式,也支持插件扩展。
内网穿透
[[内网穿透工具]]
- [[frp]]
- [[ZeroTier]]
- [[Tailscale]]
- [[OmniEdge]]
代理相关
[[siteproxy]] 是一个反向代理工具,搭建之后可以访问 YouTube/Twitter/Google 等。
论坛类
[[开源论坛程序 Forum]]
- [[Discourse 搭建]]
- [[Flarum]]
- [[symphony]] 基于 Java 的论坛
- [[Vanila]]
- [[phpBB]]
- [[studygolang]]
远程桌面
- [[RustDesk]] 是一个开源,小巧的远程桌面控制软件,和 [[TeamViewer]],[[AnyDesk]],[[ToDesk]] 等等一样好用。
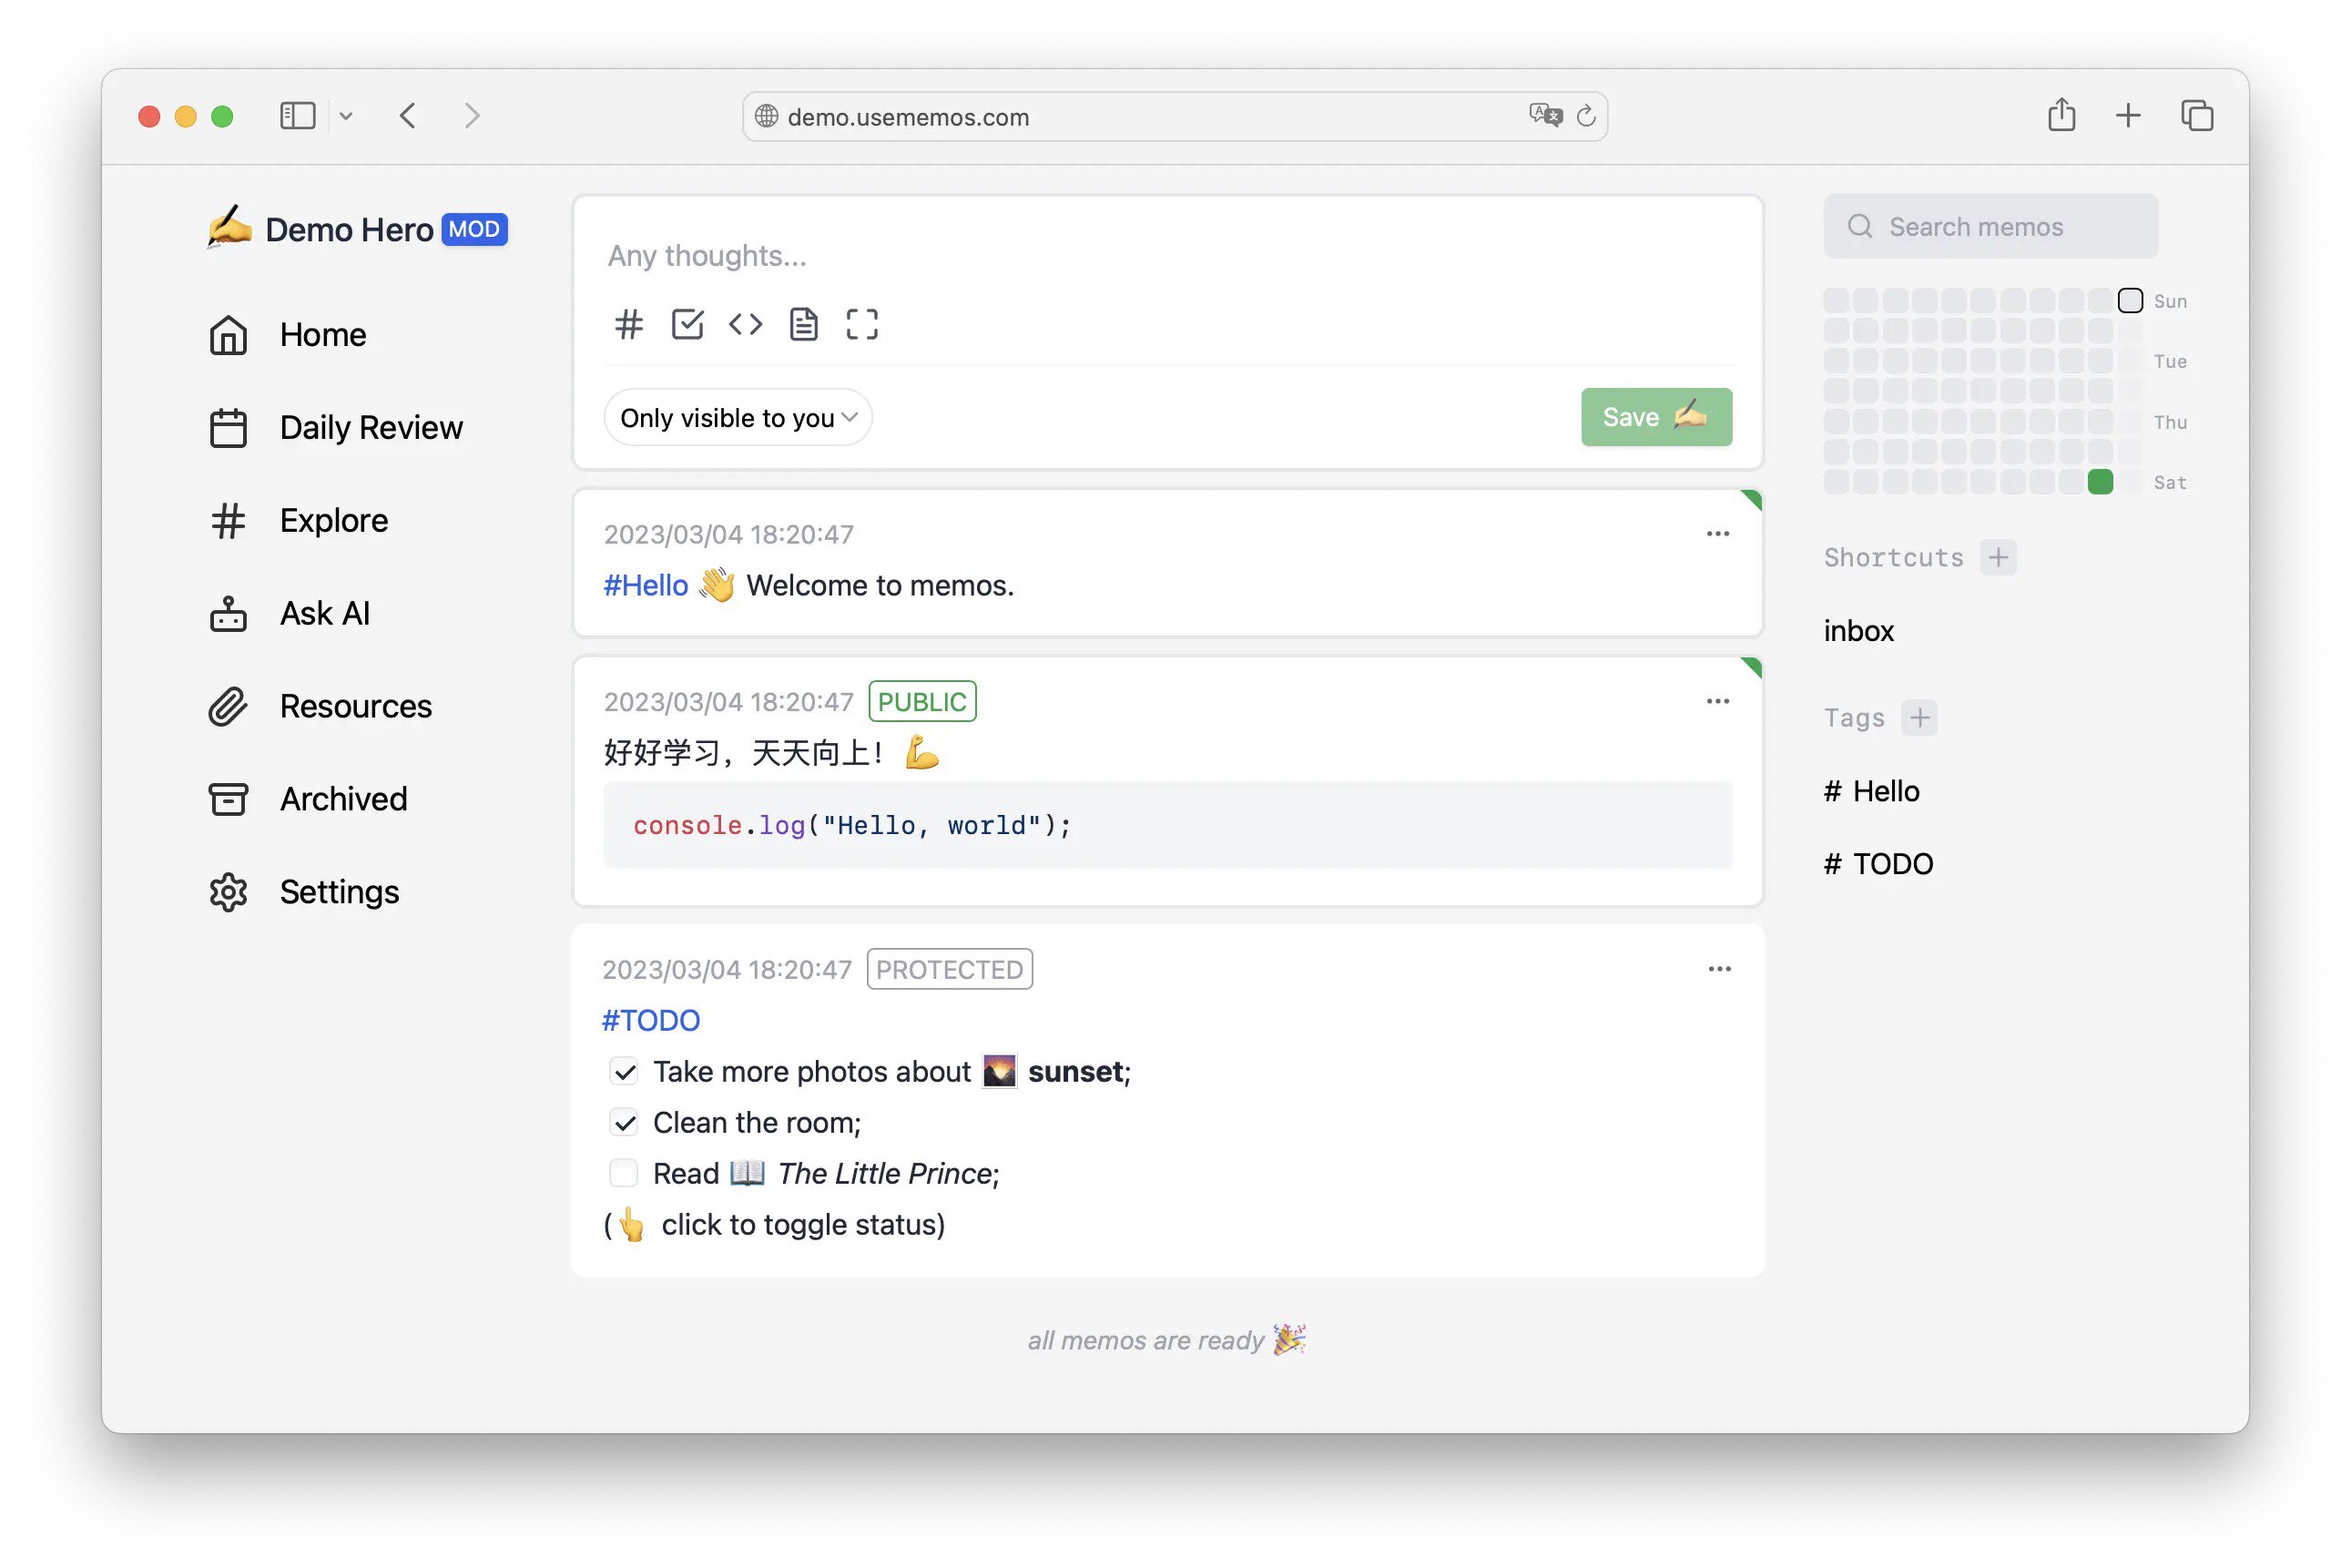
备忘录
[[memos]] 一个轻量级的备忘录。
自托管评论系统
[[静态网站评论系统]]
- [[Artalk]]
- [[Remark42]]
白板
[[excalidraw]]
检测网站在线
- [[uptime-kuma]]
社交媒体
- [[Mastodon]]
- [[Misskey]]
- [[fediverse]]
自建 k3s
[[k3s]]
网游
当然如果有玩游戏的爱好,也不妨搭建一个 [[Minecraft]] 服务器,邀几个好友一起玩耍。
其他
- vocechat 是一个仿照 Discord 的聊天室。
- chartmuseum Host your own Helm Chart Repository
- bark-server
- docker-proxy/gh-proxy 加速国内访问的代理
- [[paperless]] 管理扫描文件
- changedetection 检测网站变更
- [[Node-RED]],低代码事件驱动的应用。
- [[Kopia]]
- [[Tdarr]] 是一个音频视频的分析和转码工具。
- actionsflow: 完全兼容 Github Action 的自托管 workflow 服务
- excalidraw: 自托管白板项目
- 直播相关处理工具
- DDTV:直播开播自动录制、转码保存
- BililiveRecorder: 同上
- owncast: 自建直播服务器
Other
[[instagram-scraper]]
关于 BitTorrent 和 PT 你需要知道的一切
几个 bt 中经常见到的词汇
bt 其实是 BitTorrent 的缩写,后文为了描述简单统一简称为 bt。
BitTorrent 协议由美国程序员布莱姆·科亨在 2001 年发布。
peer
peer 可以理解成节点,或者等同于 client 客户端。只要你在本地打开了 bt 软件,连接了 swarm,有数据传输,就可以认为是一个 peer. 严格的来说,peer 指的是还未下载完成的节点。但通俗的就认为所有连接到 swarm 的客户端都叫做 peer,这个意义上, peer 和 client 有着相同的含义,并不区分是否完成了整个 torrent 的下载。
用英文来解释 peer 是,a person who has the same social status as you,地位同等的人,相互平等的人,同辈。
Swarm
swarm 是一个用来描述当前分享的 torrent 的所有可连接的 peers 的术语,换句话说,一个 swarm 也就是当前对同一个种子文件正在交换数据的 peers. 在 bt 最初的协议中 peers 需要请求 tracker 来获取 swarm,也就是当前可连接的 peers 列表。
Tracker
当一个 peer 想要加入某一个特定的 torrent 时,需要有几个初始化的操作。首先需要知道有哪些 peers 正在分享着改 torrent,以便于开始连接和传输数据。根据 BitTorrent 最初的协议,初始化过程由 Tracker 提供。后来演化过的 BT 协议又加入了其他的方法,比如说 DHT.
BitTorrent Tracker 是一个 http/https 服务,通过 BitTorrent 协议间接的和 peers 连接,它可以追踪哪些 seeds 和 peers 在一个 swarm 中。为了初始化下载,客户端首先要和 Tracker 通信,获取一个当前可连接的 peers 列表,这些 peers 都在同一个 torrent 的 swarm。Tracker 实际上并不参与任何数据的传输,并且也没有 torrents 数据的备份。一旦 peers 列表获取成功,peer 通信就可以不依赖 Tracker 进行。但是 clients 会周期性地向 Tracker 发送数据报告,并换取新节点的信息。
基本上,Tracker 就是一台回应 HTTP GET 请求的服务器,请求中包含客户端整体传输的数据。回应信息包括一个 peers 列表,让 peers 参与 torrent 传输。URL 包含在 torrent 文件的 metadata 的 announce URL 中。其他参数被附加到该 URL 后。
Tracker 服务器不能和 BitTorrent Index server 混为一谈。BitTorrent Index 是一个用来存放 torrent 文件的服务器,通常包含了种子文件的基本信息及描述等等。
Seeds and Seeding
A seed is a peer that has a complete copy of the torrent’s contents and keeps uploading it.
Super-seeding(initial seeding)
Super-seeding, 或者又被叫做,初始做种 (initial seeding) 是一种为了节省带宽而设计的技术。试想一下,当你是种子发布者,并且第一将种子发布到网上时,种子的复制可能会很慢,因为初始的做种者会将同一块数据发送给不同的 peers,而其他块可能还没有被上传。为了防止这种情况,一些客户端可以开启 super-seeding 模式,这时会优先发送还没有被上传的数据块,通过算法来保证上传一个种子尽可能的节省带宽。1
当你是种子的发布人,并且没有其他做种者时,开启初始做种就会将自己伪装成下载者并检测其他下载已经完成的部分,仅传输所有人都缺少的部分,一般出种所需流量与资源大小差不多,普通做种可能需要两倍流量。一般在 PT 中不需要开启初始做种,因为,开启后上传速率和上传量和未开启前比较会显著下降,很多人会因为其中一个人带宽不好而无法尽快出种。因此初始做种通常用于公网 BT。
DHT
DHT(Distributed Hash Table) 网络用来寻找在 swarm 中的 peers 的 IP 地址,用来取代了 Tracker 的功能。DHT 允许通过 info hash 来查询 peers,而不需要通过 Trackers.
DHT 是分布式系统的一种,它通过一个类似 hash table(key,value) 的查询服务。任何参与的节点都能迅速的获取到 key 关联的信息。维护从键到值的映射的责任分布在 DHT 网络的各个节点中,以这样一种方式,这样的更改将导致最小程度的中断。这使 DHT 网络可以扩展到非常多的节点,并处理连续的节点到达,离开和故障。2
在原始的 BitTorrent 设计中,Tracker 是初始化时必须要经过的步骤,并且 Tracker 被部署在网络的单一节点上。这就意味着,BitTorrent 会有单点故障,这也是 BitTorrent swarm 的阿喀琉斯之踵,如果 Tracker 故障,那么 peers 就无法相互知道,结果就是 torrent 死掉。而在 DHT 网络中,这个问题就不存在。二者的差别在于,不像 Tracker,DHT 不依赖于一个单一机器来初始化 peers 的连接,而是将 DHT 网络中所有的节点都认为是潜在的节点,因此提供了容错机制。在 DHT 网络中初始化机制包括了一些冗余的机制:
- 使用一些著名的或者广泛熟知的 DHT 节点
- 使用一组 BitTorrent 客户端退出时缓存的节点
- 使用一组 torrent 文件中的 bootstrap 节点
- 从 swarm 中下载至少包含一个 peer 的 torrent,然后交换 UDP 端口
一旦获取到一个节点,客户端可以使用该节点在 DHT 网络中找到更多的节点,然后就可以用 DHT 节点来获取 peers 完成下载。3
Peer Exchange (PEX)
在 BitTorrent 文件共享网络中,Peer Exchange 用来维持共享同一个 torrent 的一组 peers. 在原始的 BitTorrent 协议中, 所有的 peer 都需要依赖 Tracker 来获取一组 peers. Peer Exchange 允许一组 peers 中的成员自己在 swarm 中交换群组成员信息,也就意味着可以减少对 Tracker 的依赖,减少对 Tracker 的轮询,也就减少了 Tracker 的负载。
Peer Exchange 并没有完全的消除对 Tracker 的依赖,一个 peers 第一次要加入给定 torrent 的 swarm,它必须联系 Tracker 来找到该 torrent 的一组 peers.
Magnet Links
根据原始的 BitTorrent 网络协议,.torrent 文件是从 torrent 网站(通常是索引网站)下载的。下载文件后,BitTorrent 客户端会从.torrent 文件中计算信息密钥的 20 字节 SHA-1 哈希,它会在对跟踪器(或 DHT网络)的查询中使用该 ID 来唯一地识别种子并找出共享该 torrent 的其他对等方的 IP 地址,随后它将连接并下载.torrent 文件中的内容。
Magnet Links 更进一步,info-hash 值已经被计算得到。因此当使用一个 Magnet Link, BT 客户端可以得到 info-hash。然后 BT 客户端可以通过该 hash,在 DHT 网络中查询,找到网络中同样共享着这个 torrent 的 peers。然后客户端会从其他 peers 那边下载这个 torrent 文件。一旦获取到 torrent 文件,后面就是熟悉的流程了。
可以看到客户端依然需要依赖 .torrent 文件来完成初始化过程,因为 torrent 包含着下载需要的必不可少的信息,但是可以看到,不再需要依赖一个 Tracker 服务器,你甚至可以不需要从网站上下载一个 .torrent 文件,在 DHT 网络中就存在。
然而,请注意,Magnet Links 不能消除对 torrent 文件的依赖。 然而,他们可以减少种子索引网站的负载,也可能有更好的机会让一个种子活着,因为一旦 .torrent 文件在 DHT 网络上,它理论上不需要在网站上下载;, 你所需要的只是一个 Magnet Lins, 并且,如果原始站点上的 torrent 下载中断或不再提供它,Magnet Links 更有可能在 Internet 上传播的。 在更大范围内,Magnet Lins 的优势在于其开放性和平台独立性带来的多功能性;几乎在任何操作系统上,都可以使用为不同网络和协议设计的完全不同的客户端应用程序来下载资源相同的磁链接(前提是该资源在那些网络上可用)。可以同时从多个网络中搜索和检索相同资源的多网络客户端也是如此,所有这些都具有单个磁链。
另外,由于 Magnet Lins 是纯文本的,因此可以简单地将链接复制并粘贴到:电子邮件,即时消息,博客或其他社交网络媒体中,以实现非常快速的分发;
Magnet Links 由一系列一个或多个参数组成,其顺序并不重要,其格式与许多 HTTP URL 末尾的查询字符串相同。最常见的参数是“ xt”,表示“确切主题”,通常是由特定文件的内容哈希形成的
比如:
magnet:?xt=urn:btih:b0a8dbd866c5f6d2b619f17e1988f46bdace72ba&dn=Absolute+OpenBSD+-+UNIX+For+The+Practical+Paranoid
这个例子中,xt 参数是资源的十六进制 SHA-1 ,dn (display name) 是一个可读的名字。
Magnet Links 实现的第一版需要 BitTorrent hash 值包括一个 Base32 的编码,后来改成了 hex encoding ,这也是目前官方的 BitTorrent specifications 建议的格式。4
Peer DL
Peer DL.
Peer Download Rate is an estimated rate at which the peer is downloading based on the peer’s reported change in pieces obtained. This estimation is very crude and is most likely inaccurate, so it should only be lightly relied upon.
几个 PT 站相关的概念
分享率
分享率是几个概念中比较好理解的一个,顾名思义就是上传量 / 下载量的比率。因为 BitTorrent 鼓励分享,所以这个比率反映着每一个用户的分享比例。
一般的站点会有如下的要求:
当以下情况时将被自动降至本级:
- 如果你已经下载了超过 50GB,你应该有大于 0.6 的分享率。
- 如果你已经下载了超过 100GB,你应该有大于 0.7 的分享率。
- 如果你已经下载了超过 200GB,你应该有大于 0.8 的分享率。
- 如果你已经下载了超过 500GB,你应该有大于 0.9 的分享率。
- 如果你已经下载了超过 1000GB,你应该有大于 1.0 的分享率。
如果没有达到要求就会被 BAN 掉,因分享率不达标而收到系统自动警告的情况下,默认的警告的期限是一周,一周结束后警告标志才会消失。
H&R
H&R 是 Hit and Run 的缩写,表示下载完资源后在规定时间内没有完成最少做种时间的行为,简单说就是“下完就跑” 实行 H&R 考核是为了提高资源保种率,使老资源不断种。
HR 未达标数 >= 10, 将被 BAN.
H&R:0/0 解析为,(要做种的种子数『显示数字为黑色』)/ 未达标(在规定时间内没完成做种时间的种子数『红色数字显示』)
魔力值
按照作种时间和数量计算得到,魔力值的计算有一个非常复杂的公式,在这里研究这个公式也并不显示,要提升魔力值最好的方法就是作种,并且需要一定量地作种,然后经常在论坛中交流就行,没多久就会发现魔力值会平稳增长。
下面是有人总结出来的一些可控的增长魔力值的方法,不同站点可能并不相同,所以参考一下即可,不必太认真。
- 发布新种子 = 30 个魔力值
- 上传一个字幕 = 15 个魔力值
- 发布新主题 = 2 个魔力值
- 回复帖子 = 1 个魔力值
- 发布种子、候选的评论 = 1 个魔力值
- 参与一次调查投票 = 1 个魔力值
- 参与一次候选投票 = 1 个魔力值
- 参与一次趣味盒投票 = 1 个魔力值
- 说谢谢 = 1 个魔力值 (有的站是 0.5 个魔力值)
- 收到感谢 = 1 个魔力值发布的趣味盒内容获得用户较高的评价
提高魔力值的方法
在了解了魔力值的计算公式后,提升魔力值的方法自然也就有了,因为魔力值依赖作种,所以作种数越多那么魔力值提升也就越快,那么如何快速作种呢,有一个快速简单的方法,就是将种子列表根据大小排序,然后从小到大把自己感兴趣的小种子全部下载下并长期挂着作种。另外不要吝啬任何给予别人感谢的机会,在鼓励别人的同时,自己也能获得一定的魔力。
做种率
往往有些时候 PT 新人考核的时候第一项就是做种率,这个是一个比较好理解的概念,做种率就是作种时间和下载时间的比率。所以要提高做种率,就是要以最快的速度下载,并且以最长时间作种,或者和魔力值的获取方法相似,作种比较小的种子,因为下载快,所以做种率相对于体积比较大的种子会有很多优势。
PT 站生存指南
PT, 也就是 Private BitTorrent, 私有的 Tracker,只有特定人群可以连接的 BitTorrent Network.
如何提高分享率
顾名思义,就是上传量 / 下载量的比率,规则中对分享率是有要求的。在保持网络畅通的情况下,达成下载是可控的,只有找几个非免费的,并且作种人数比较多的种子,基本下载就可以达到,但是上传量并不是那么容易完成。
首先要大致知道 bt 的基本原理,简单的来说 BitTorrent 是一个 peer-to-peer file sharing,点对点文件共享的协议。知道这个后,就很容易的理解,上传,下载,分享了。
要提高分享率,也就是要增大分子,上传量,在下载量(分母)可控的情况下,如何提高上传呢?下面就是几个技巧。
Free&2x 种子不要错过
Free 优惠的种子千万不要错过。
主动分享
制作种子,主动分享的内容,所有人都会从分享者这边获取,也就意味着能够控制上传量。但制作种子对新手来说有一些难度,所以新手可以继续往下看。
下载热门新种
对于没有人下载的种子,那么下载的时候只有一个人,那么你的本地文件也就没人连过来下载,自然也就没有上传量。而对于刚发布的种子,因为作种的人相对较少,而下载的人多,所以只要连上 peers,你本地的部分自然就会有人从你的本地获取,自然就有了上传。
为了攒上传,所以在选择种子时记得找免费的,上传人数少(新种),下载人数多(热门)的。
下载冷门好种
当热门种子被大不分人下载并作种后,如果还下载热门种子,那基本上只有下载速度,并且可能跑满带宽,但是上传可能就不多了,因为同时在下载的人有非常多已经完成的节点可以连接,而并没有多少人连到你的机器下载,所以你的上传就没了。
在硬盘空间足够的情况下下载大种子
种子越大下载的时间越多,通常能有不错的上传。
保持作种
提高分子的另外做法就是 24h 保持作种,可能本地的作种目前没有人在下载, 但是无法保证之后没有人来下载,所以为一些冷门的好种作种不时的就可能有人能连过来给增加上传。
通过软连接来辅种
都知道如果相同的文件,被封装制作成不同的 torrent,那么在下载时,客户端只会对相同的文件进行校验。而如果一旦目录结构变化了,那么就会重新下载。这个时候利用软连接来连接目录结构就能校验同一个文件。
举一个简单例子,比如 A.torrent 和 B.torrent 都是对文件 resource 的种子,但是在制作 torrent 时 A, B 种子分别是对 dir_a/resource 和 dir_b/resource 两个文件夹下的 resource 制作的种子。那么在下载时,即使是同一个文件,那么在下载时也会分别下载到两个文件中。如果想要本地文件中只有一份 resource 那么可以先下载 A.torrent 那么在本地就有了 dir_a 目录,此时用 ln -s 来制作软连接:
ln -s dir_a dir_b
然后再下载 B.torrent 时,会发现客户端只会对文件进行校验,而不会重新下载 resource 了。
当然如果是文件名不一致,也可以利用 ln 来软连接一个新的文件,达到同样的效果。
Extend
一款用來輔助 PT 的 Chrome 插件:
一键生成媒体信息:
最后,个人也搭建了一个私人的 PT,分享一些电影、图书、综艺,欢迎来玩。
reference
Zettelkasten 笔记法
在接触到 Obsidian 这款笔记应用的时候听说了 Zettelkasten 笔记法,这些天陆陆续续地阅读了一些相关的材料,说起来 Zettelkasten 是一个非常简单的方法,但要真正理解其背后的思维方式,以及真正地贯彻到现实中来也需要好好的整理一下。
什么是 Zettelkasten?
Zettelkasten 是一个德语词,这个词语可以拆分成两个部分,”Zettel”,表示的是笔记或者纸条 (slip of paper),而 “Kasten” 表示的是盒子 (box),两者合起来表示的意思是 box of notes,指通过不同盒子来管理的笔记的方法。[^wik] 这个笔记法使用的集大成者是德国的社会学教授 Niklas Luhmann,这位教授除了在学术上的影响力之外,就是他在 40 年的学术生涯里著有超过 70 本书,400 多篇学术论文,并且涉及法律,经济,政治,艺术,宗教,生态等等各行各业。
如果要用简单的话来描述这个方法大致可以分成这样几个步骤:
- 卡片是用来存储思考、笔记的,并且卡片是原子的
- 卡片和卡片之间可以形成联系
Zettelkasten 说到底就是利用一组盒子来管理笔记,在现实中 Luhmann 教授使用 6 乘 4 的木质家居抽屉来管理他所有的笔记。
传统笔记方法的缺点
不管是在学习还是在日常中我们都有大量的时间对一些主题的事情做出不同的记录,传统意义上的笔记有可能是记录在白纸上,有可能记录在书页的空白处,也有可能分布在手机或者电脑的电子笔记本中。如果使用电子的方式,通常会使用文字处理软件,或者相关的管理工具,这些工具通常也会提供分类,标签这些常用的功能。
在整理这些内容的时候可能会使用 mind maps 或者 concept map 这类的思维导图工具,大部分情况下也会列出大纲。
传统笔记比如 Evernote,OneNote, WizNote 的一些缺点:
- 每一个笔记的内容都是隔离的,相互之间只能通过 category, tag 进行关联,通常一篇笔记的内容就是围绕一个特定的主题进行归纳和总结,于是每一篇笔记的内容之间就缺乏了主题的关联
- 传统的笔记是一个线性的结构,管理记忆时大都通过层级目录进行管理。
这些传统的方法都各自有各自的优缺点,但它们都无法帮助我们将这些笔记或者想法关联起来,反而极有可能让我们忘记这些笔记或者想法的存在,久而久之这些可能产生价值的笔记或者想法就可能被收纳到床底,或者被遗忘到哪个云服务商的服务器里,或者被锁到哪个不知名的文件夹中,从而彻底失去其意义。
流行了数十年的数码笔记本,比如 Evernote 之类,有可能让用户陷入 collector’s fallacy([[收藏家谬误]]),用户在使用这些笔记时,可能收集大量的信息,而从不对这些内容进行整理和提取。如果不对收集的笔记进一步的精读,那么到最后笔记就会一点点被遗忘。
再来思考一下思维导图 (mind maps),概念图 (concept maps),或者大纲 (outlines),它们可能是知识管理的一种解决方案。这些工具将我们记录下的想法以一种形象的图组织起来。但问题在于,这些方法在整理某一些具体领域的笔记的时候非常有效,但如果一旦需要整理上百个各式各样的想法和笔记,就显得力不从心。虽然你可以不会花 40 年的时间整理一副超过 90000 条想法的思维导图,但是这就是 Luhmann 通过他的 Zettelkasten 所做的事情。再回想一下我自己使用 WizNote 的经历,多少年里也积累了快 5000 条笔记。
如何使用 Zettelkasten 来做笔记
Zettelkasten 适合的不同的场景,比如阅读一本书,或者随时冒出的想法,但是不同的场景在使用 Zettelkasten 的时候大致要遵循如下几点:
- 一般的 Zettelkasten 工具都会自动将当前的日期加时间作为卡片的标题,比如 202002021100-Title
- 用自己的话重新组织笔记内容,并将中心内容作为卡片最重要的开头,重在理解而非记录,这个核心内容可以核心的改过这则卡片的内容,以便于未来重读或将连接连入
- 在添加完新笔记后,主动发现和已有笔记的关联,并使用双向链将不同的卡片关联起来(在已有的笔记内容上关联其他已经存在的笔记)
Reading doesn’t magically increase your knowledge. Just because some text has entered your eyeballs and visited your short-term memory, that doesn’t mean you’ve learned from it.
记住 Zettelkasten 的重点,卡片和连接。
- 卡片要是能理解的,原子的,独立的,简单的
- 连接,则是创造永久记忆的方式
在读书时实践 Zettelkasten
在阅读时随时记笔记,但千万不要让笔记打断阅读的重点。在《如何阅读一本书》中,作者将读书分成四个部分
- 基础阅读,这个阶段快速阅读内容,并标记感兴趣的内容
- 检视阅读,这个阶段你需要回答出这本书的类型,作者再讨论什么内容,以及作者使用什么样的结构来完善他的观点
- 分析阅读则是全盘的理解作者要表达的意思,并将书中的观点提出自己的想法
- 主题阅读,这更为复杂系统化,在主题阅读时需要阅读一系列的书籍,并将书中不用的观点进行关联
我个人建议在阅读的第一二个阶段可以进行快速的阅读,但是在分析阅读的时候一定要作笔记,并用自己的话将作者的观点进行消化。
Take Literature Notes
每当遇到需要记住的内容,或者可能会在未来引用的内容,立即使用如下的方式记录:
- 保持简洁,不超过 3 句话
- 用自己的话重新组织,保持注意力在阅读的内容上
Take Reference Notes
在完成阅读后立即开始记录索引
Make Permanent Notes
回顾所有记录的笔记,思考他们如何影响当前的思考,当前的研究方向。
目标不是尽可能多的收集笔记,而是要思考这些笔记对佐证目前自己的观点有没有帮助。
Review and repeat
在完成整个读书的过程后,要定期的进行回顾,在不断有新的 Zettel 加入时也要不断的进行关联和思考。
应该只使用一个 Zettelkasten
在以前有段时间我曾经犯下过一些错误,就是将不用的笔记人为的分隔在不同的笔记本中,然后渐渐有一些笔记本再也不会打开,后来看到一些文章才恍然大悟,即使不是 Zettelkasten 我也只需要一个笔记本,不断被审阅的笔记,不断被连接的笔记才有价值。
只使用一个 Zettelkasten 的优点:
- 可以通过搜索发现潜在的关联,即使很多年前记录的笔记,也可能与未来的某一天写下的笔记建立联系,这种不断的关联和发现会不断的刷新对[[知识]]的认知
- 使用 Zettelkasten 做笔记时应该使用日期而非主题对笔记内容进行划分,长远来看,使用单一笔记系统会越来越丰富其内容,而不会因为主题或者多个 Zettelkasten 而产生分隔
reference
NAS 上的音乐管理应用 Funkwhale
NAS 上的文件已经有足够多的管理系统 了 12,而电影也有 [[Kodi]], [[Emby]], [[Plex]] 等等工具,图片同样 Chevereto,Lychee,电子书有 Calibre-web,但就是音乐管理工具没有找到一个比较合适的。
构想
我想的应该这个管理系统可以直接通过 Docker 安装,提供一个比较美观的 Web 页面。
- Docker
- 映射本地音乐文件夹
- Web 管理界面
- 可以根据文件的 metadata 自动归类,如果可以手工进行编辑就更好了
- 能在线播放
于是乎我带着这样的目的在 awesome-selfhosted Audio streaming 专区寻找,从编程语言,到 Demo,一个个看,然后就发现了 Funkwhale 点开项目主页介绍,界面非常漂亮,Demo 这各个功能也都非常贴心,立即看安装说明,Docker 搞起。并且 Funkwhale 还自带 pot,新建立的站点可以和网络上的站点连接起来相互分享,像极了之前的 SNS Mastodon.
Funkwhale 用 Python,Django 编写,遇到 bug 倒时候也能看懂代码了。
Install
使用 Docker 安装:
export FUNKWHALE_VERSION="0.20.1"
touch .env
chmod 600 .env  # reduce permissions on the .env file since it contains sensitive data
cat > .env <<EOD
# Replace 'your.funkwhale.example' with your actual domain
FUNKWHALE_HOSTNAME=your.funkwhale.example
# Protocol may also be: http
FUNKWHALE_PROTOCOL=https
# This limits the upload size
NGINX_MAX_BODY_SIZE=100M
# Bind to localhost
FUNKWHALE_API_IP=127.0.0.1
# Container port you want to expose on the host
FUNKWHALE_API_PORT=5000
# Generate and store a secure secret key for your instance
DJANGO_SECRET_KEY=$(openssl rand -hex 45)
# Remove this if you expose the container directly on ports 80/443
NESTED_PROXY=1
EOD
运行:
docker run \
	--name=funkwhale \
	--restart=unless-stopped \
	--env-file=/share/Container/funkwhale/.env \
	-v /share/Container/funkwhale/data:/data \
	-v /share/Music:/music:ro \
	-e PUID=1000 \
	-e PGID=1000 \
	-p 6000:80 \
	-d \
	funkwhale/all-in-one:latest
或者使用 docker-compose:
version: "3"

services:
  funkwhale:
	container_name: funkwhale
	restart: unless-stopped
	# add the version number in your .env file, or hardcode it
	image: funkwhale/all-in-one:0.20.1
	env_file: /share/Container/funkwhale/.env
	environment:
	  # adapt to the pid/gid that own /srv/funkwhale/data
	  - PUID=1000
	  - PGID=1000
	volumes:
	  - /share/Container/funkwhale/data:/data
	  - /share/Music/:/music:ro
	ports:
	  - "6000:80"
导入音乐文件
使用如下命令导入文件:
# For file structures similar to ./Artist/Album/Track.mp3
docker exec -it funkwhale manage import_files $LIBRARY_ID "/music/**/**/*.mp3" --in-place --async
这里的 LIBRARY_ID 需要到界面中找。
外延
koel
[[Koel]] 是一个基于网页的音乐媒体播放器。
Koozic
airsonic
- [[Airsonic]]
- https://github.com/airsonic/airsonic
reference
几个常见的 NAS 系统整理及选择
看文章老有几个 NAS 系统被翻来覆去的提到,这里就一起看看 Wiki,看看有什么区别吧。
FreeNAS
开源 NAS 系统中最著名也最强大的一个系统,基于安全和稳定著称的 FreeBSD,集成了 Sun 公司的 ZFS 文件系统,ZFS 拥有很多文件管理的特性,非常适合管理大量可扩展的数据系统。1 目前由 ixsystems 公司维护。
硬件依赖
FreeNAS 对硬件有一定的要求(ECC 内存),达到日常可用需要较大内存,如果要安装插件或者启用虚拟机可能需要更多。FreeNAS 的 ZFS 需要一个基本的内存量来维持基本的运行。2
安装
安装教程:
NAS4Free
基于 FreeNAS 0.7 开发的一个分支,由原 FreeNAS 系统开发者发起创建。
官网:
OpenMediaVault
OpenMediaVault 是一款基于 Debian 的 NAS 操作系统,项目领导人是 Volker Theile,于 GUN GPLv3 下开源。OpenMediaVault 和 FreeNAS 有个很深的缘源,他们都基于 FreeNAS,不过在 2009 主要的两位项目负责人产生分歧,所以 Volker Theile 基于 Linux 重写了 FreeNAS 于是成就了 OpenMediaVault,而另一位 FreeNAS 的创始人 Olivier Cochard-Labbé 则基于 FreeBSD 重写了 FreeNAS,于是成就了今天的 FreeNAS。3
OpenMediaVault 主要面向小型办公环境和家庭,所以体积非常小,并且还有树莓派版本。
个人在对比了开源操作系统之后选择了 OpenMediaVault,日常使用起来基本无问题。
优点
- 内存占用小
- 可以充分利用 Debian 的软件生态
- 支持 Docker
- 可以借助第三方软件([[MergerFS]])组存储池,磁盘冗余备份
其他参考链接
ESXi
准确来讲 [[ESXi]] 不能算作是一个 NAS 系统,更多地可以称其为虚拟机系统,用户可以在 ESXi 上虚拟化出多个系统充分利用硬件性能。
ESXi 由 VMware 公司开发,是VMWare vSphere Hypervisor 套件之下重要组件,这是一套为企业而设计的虚拟机。ESXi 可以方便的安装在服务器中,然后就可以虚拟化安装其他系统。
前身是 ESX,依赖 Linux,后来抛弃 Linux 变成了 ESXi。
界面比较友好,但是硬件兼容性差。
更详细的介绍可以参考这个视频
PVE
[[PVE]] 的全称是 Proxmox Virtual Environment,是基于 Debian 的 Linux 系统,虚拟机内核为 KVM,硬件兼容性好。和 ESXi 一样,也算不上 NAS 系统,但是可以将其作为物理机的操作系统,再此基础之上安装,比如 OpenMediaVault这样为 NAS 而设计的系统。我自己配置的 NAS 就是这样一套系统。
unRAID
[[unRAID]] 是基于 Slackware 这个 Linux 发行版的 NAS 系统 (6.2RC2 基于 14.2)。unRAID (又有人写作 Unraid, 或者 UnRaid) 是另一款 NAS 操作系统,实现的功能都大同小异 4,unRAID 不通过组 RAID 方式来存储数据,但是可以和 RAID 一样做到冗余备份,简单来说 unRAID 就是带有检验盘的磁盘簇 (JBOD)。
unRAID 另外比较亮眼的就是虚拟化技术以及硬件直通,可以在此基础上虚拟化安装各个操作系统以及充分利用硬件接口。
unRAID Server OS is a Network Attached Storage server operating system that boots from a USB Flash device, and is specifically designed for digital media storage.
unRAID 6 默认使用 XFS 文件系统,但如果定义了 Cache poll,那么会使用 BTRFS 文件系统。
unRAID 优点
- 系统从 U 盘启动,启动后系统在内存中
- 集成插件支持,集成 Docker 支持,支持虚拟机
- 支持硬盘无访问自动休眠
- 只需要一个校验盘(需大于阵列中最大的盘的容量),整个磁盘阵列允许一个磁盘挂掉,只需要用同等大小的磁盘替换即可
- 扩容方便,只需要往阵列中继续添加磁盘即可,唯一的限制就是新添加的硬盘容量不能大于校验盘大小。如果新加入的盘容量大于校验盘则需要先将校验盘替换成该硬盘,然后将原来的校验盘作为新盘加入
unRAID 缺点
- 系统配置在重启后可能丢失,并且基于一个非主流的 Linux 发行版,排查问题可能遇到瓶颈
- unRAID 是需要授权的,但相反这个对于非技术人员反而可能是优势,毕竟可以有一个技术支持。unRAID 的授权价格从最低 $59(6 块硬盘), $89(12 快硬盘),到 Pro $129 (无限硬盘)5
其他
Openfiler
这是一款基于文件的存储系统。
官网: https://www.openfiler.com/
- CIFS,NFS,HTTP
- SAN feature,iSCSI,FC
- High Availability / Failover
- Block Replication (LAN & WAN)
- Web-based Management
- Cost-free Storage Capacity Expansion
NexentaStor
NexentaStor is an OpenSolaris or more recently Illumos distribution optimized for virtualization, storage area networks, network-attached storage, and iSCSI or Fibre Channel applications employing the ZFS file system. Like OpenSolaris, NexentaStor is a Unix-like operating system.
RockStor
基于 Linux,采用企业级文件系统 BTRFS,提供 SMB/CIFS、NFS 以及 SFTP 常见的共享方式
EasyNAS
Conclusion
总结来讲,FreeNAS 有最好的文件系统 – ZFS,但是对 Docker 支持需要借助虚拟机有一定性能损耗,OpenMediaVault 最轻量,但是对虚拟机不支持硬件直通,unRAID 可以非常方便的扩展硬盘池大小,对虚拟机支持也比较完善。
对于我个人而言,目前我并没有支持 ECC 的内存,也没有备用多余的内存条,我目前的数据也不需要做到实时备份,所以目前我不需要 FreeNAS,而 unRaid 又有一些我无法容忍的问题(比如配置丢失的问题,作为个人家用虽然可以 24 小时开机,但我不想每次开机后需要重新配置),综合下来 OpenMediaVault 最符合我的需求:
- 一个稳定的系统,Debian 上的扩展也非常多
- Docker 也支持
- 配合 mergerfs 可以实现多物理盘组合,实现 UnRaid 中随时添加磁盘的特性
- 配合 SnapRAID 可以实现冗余备份
- 配合 [[Prometheus]] 和 Grafana 可以对 NAS 进行全面的监控,弥补起管理后台监控的不足
- 最重要的就是 OpenMediaVault 是开放源代码的
最后我的方案就是在硬件上安装 Proxmox,然后在 Proxmox 中安装了 OpenMediaVault。
reference
- FreeNAS vs unRAID https://www.youtube.com/watch?v=aXsRIrC5bjg
- https://www.openmediavault.org
文章分类
最近文章
- Dinox 又一款 AI 语音实时转录工具 前两天介绍过 [[Voicenotes]],也是一款 AI 转录文字的笔记软件,之前在调查 Voicenotes 的时候就留意到了 Dinox,因为是在小红书留意到的,所以猜测应该是国内的某位独立开发者的作品,整个应用使用起来也比较舒服,但相较于 Voicenotes,Dinox 更偏向于一个手机端的笔记软件,因为他整体的设计中没有将语音作为首选,用户也可以添加文字的笔记,反而在 Voicenotes 中,语音作为了所有笔记的首选,当然 Voicenotes 也可以自己编辑笔记,但是语音是它的核心。
- 音流:一款支持 Navidrom 兼容 Subsonic 的跨平台音乐播放器 之前一篇文章介绍了Navidrome,搭建了一个自己在线音乐流媒体库,把我本地通过 [[Syncthing]] 同步的 80 G 音乐导入了。自己也尝试了 Navidrome 官网列出的 Subsonic 兼容客户端 [[substreamer]],以及 macOS 上面的 [[Sonixd]],体验都还不错。但是在了解的过程中又发现了一款中文名叫做「音流」(英文 Stream Music)的应用,初步体验了一下感觉还不错,所以分享出来。
- 泰国 DTV 数字游民签证 泰国一直是 [[Digital Nomad]] 数字游民青睐的选择地,尤其是清迈以其优美的自然环境、低廉的生活成本和友好的社区氛围而闻名。许多数字游民选择在泰国清迈定居,可以在清迈租用廉价的公寓或民宿,享受美食和文化,并与其他数字游民分享经验和资源。
- VoceChat 一款可以自托管的在线聊天室 VoceChat 是一款使用 Rust(后端),React(前端),Flutter(移动端)开发的,开源,支持独立部署的在线聊天服务。VoceChat 非常轻量,后端服务只有 15MB 的大小,打包的 Docker 镜像文件也只有 61 MB,VoceChat 可部署在任何的服务器上。
- 结合了 Google 和 AI 的对话搜索引擎:Perplexity AI 在日本,因为 SoftBank 和 Perplexity AI 开展了合作 ,所以最近大量的使用 Perplexity ,这一篇文章就总结一下 Perplexity 的优势和使用技巧。